2017年5月31日水曜日

RPi_0022 USBシリアル接続

正常に立ち上がらないとか、期待したプロセスが起動していないとかの調査には、ブートメッセージが見たい。HDMIの表示でもよいが画面が流れてしまう。シリアル接続端末さえあれば、起動時メッセージ表示や、コンソールログインがTVモニタがない場所でもお手軽に操作できる。シリアル接続でログ記録できたりも可能だ。

Amazonで、「商品名:Raspberry Pi ラズベリーパイ用の USB-TTLシリアルコンソールのUSB変換COMケーブルモジュールのケーブル」を購入した。

Amazonプライムの表示あるところから、2個購入。ひとつ385円。だったが、価格が低い商品が出品されています。新品の出品:¥181より、とさらに安いものもあった。
お届けが翌日になってて、そんなに早くこないよねと思いきや、ゆうパケットの翌日ワイドで翌日ちゃんと届いた。


Raspberry Pi3の差し込んだピン位置。外側13ピンラインの右から、2つ空けて、黒白緑の順にピンを挿した。(黒6pin:GND, 白8pin:TX, 緑10pin:RX)赤VCC[5V]は使わない。

(1)Raspberry Pi3の設定変更内容
root@rapi3:/boot# diff cmdline.txt.org cmdline.txt
1c1
< dwc_otg.lpm_enable=0 console=serial0,115200 console=tty1 root=PARTUUID=cedef3be-02 rootfstype=ext4 elevator=deadline fsck.repair=yes rootwait quiet splash plymouth.ignore-serial-consoles
---
> dwc_otg.lpm_enable=0 console=serial0,115200 console=tty1 root=PARTUUID=cedef3be-02 rootfstype=ext4 elevator=deadline fsck.repair=yes rootwait
# cmdline.txt 1行目rootwaitの後ろを削除

root@rapi3:/boot# diff config.txt.org config.txt
56a57,60
>
> ## http://akkagi.info/20161004_web/ (参照Webページ)
> dtoverlay=pi3-miniuart-bt
>
# config.txt 最後の行にpi3-miniuart-btを追加

(2)現時点のrebootコンソールメッセージ例
# メッセージ全文は Rapi3_reboot_Message.txt を参照のこと。
# 2017-04-10-raspbian-jessie.zip版
root@rapi3:/boot# reboot
[  OK  ] Started Show Plymouth Reboot Screen.
[  OK  ] Removed slice user-1000.slice.
         Stopping Permit User Sessions...
         Stopping Login Service...
[  OK  ] Stopped Login Service.
[  OK  ] Stopped Permit User Sessions.
[  OK  ] Stopped target Network.
         Stopping dhcpcd on all interfaces...

#(たち下げ 省略)

[  OK  ] Stopped Create Static Device Nodes in /dev.
         Stopping Remount Root and Kernel File Systems...
[  OK  ] Stopped Remount Root and Kernel File Systems.
[  OK  ] Reached target Shutdown.
[  146.546572] watchdog watchdog0: watchdog did not stop!
[  146.842584] reboot: Restarting system

#(ここで再起動)

[    0.000000] Booting Linux on physical CPU 0x0
[    0.000000] Initializing cgroup subsys cpuset
[    0.000000] Initializing cgroup subsys cpu
[    0.000000] Initializing cgroup subsys cpuacct
[    0.000000] Linux version 4.4.50-v7+ (dc4@dc4-XPS13-9333) (gcc version 4.9.3 (crosstool-NG crosstool-ng-1.22.0-88-g8460611) ) #970 SMP Mon Feb 20 19:18:29 GMT 2017
[    0.000000] CPU: ARMv7 Processor [410fd034] revision 4 (ARMv7), cr=10c5383d
[    0.000000] CPU: PIPT / VIPT nonaliasing data cache, VIPT aliasing instruction cache
[    0.000000] Machine model: Raspberry Pi 3 Model B Rev 1.2
[    0.000000] cma: Reserved 8 MiB at 0x3a800000
[    0.000000] Memory policy: Data cache writealloc
[    0.000000] [bcm2709_smp_init_cpus] enter (9520->f3003010)
[    0.000000] [bcm2709_smp_init_cpus] ncores=4
[    0.000000] PERCPU: Embedded 13 pages/cpu @b9f62000 s22592 r8192 d22464 u53248
[    0.000000] Built 1 zonelists in Zone order, mobility grouping on.  Total pages: 239540
[    0.000000] Kernel command line: 8250.nr_uarts=1 bcm2708_fb.fbwidth=656 bcm2708_fb.fbheight=416 bcm2708_fb.fbswap=1 dma.dmachans=0x7f35 bcm2709.boardrev=0xa32082 bcm2709.serial=0xecc73d96 bcm2709.uart_clock=48000000 smsc95xx.macaddr=B8:27:EB:C7:3D:96 vc_mem.mem_base=0x3dc00000 vc_mem.mem_size=0x3f000000  dwc_otg.lpm_enable=0 console=ttyAMA0,115200 console=tty1 root=PARTUUID=cedef3be-02 rootfstype=ext4 elevator=deadline fsck.repair=yes rootwait
[    0.000000] PID hash table entries: 4096 (order: 2, 16384 bytes)
[    0.000000] Dentry cache hash table entries: 131072 (order: 7, 524288 bytes)
[    0.000000] Inode-cache hash table entries: 65536 (order: 6, 262144 bytes)
[    0.000000] Memory: 939064K/966656K available (6357K kernel code, 432K rwdata, 1716K rodata, 476K init, 764K bss, 19400K reserved, 8192K cma-reserved)
[    0.000000] Virtual kernel memory layout:
[    0.000000]     vector  : 0xffff0000 - 0xffff1000   (   4 kB)
[    0.000000]     fixmap  : 0xffc00000 - 0xfff00000   (3072 kB)
[    0.000000]     vmalloc : 0xbb800000 - 0xff800000   (1088 MB)
[    0.000000]     lowmem  : 0x80000000 - 0xbb000000   ( 944 MB)
[    0.000000]     modules : 0x7f000000 - 0x80000000   (  16 MB)
[    0.000000]       .text : 0x80008000 - 0x807ea73c   (8074 kB)
[    0.000000]       .init : 0x807eb000 - 0x80862000   ( 476 kB)
[    0.000000]       .data : 0x80862000 - 0x808ce350   ( 433 kB)
[    0.000000]        .bss : 0x808d1000 - 0x809901ec   ( 765 kB)
[    0.000000] SLUB: HWalign=64, Order=0-3, MinObjects=0, CPUs=4, Nodes=1
[    0.000000] Hierarchical RCU implementation.
[    0.000000]  Build-time adjustment of leaf fanout to 32.
[    0.000000] NR_IRQS:16 nr_irqs:16 16
[    0.000000] Architected cp15 timer(s) running at 19.20MHz (phys).
[    0.000000] clocksource: arch_sys_counter: mask: 0xffffffffffffff max_cycles: 0x46d987e47, max_idle_ns: 440795202767 ns
[    0.000009] sched_clock: 56 bits at 19MHz, resolution 52ns, wraps every 4398046511078ns
[    0.000026] Switching to timer-based delay loop, resolution 52ns
[    0.000289] Console: colour dummy device 80x30
[    0.001351] console [tty1] enabled
[    0.001402] Calibrating delay loop (skipped), value calculated using timer frequency.. 38.40 BogoMIPS (lpj=192000)
[    0.001471] pid_max: default: 32768 minimum: 301
[    0.001804] Mount-cache hash table entries: 2048 (order: 1, 8192 bytes)
[    0.001847] Mountpoint-cache hash table entries: 2048 (order: 1, 8192 bytes)
[    0.002805] Disabling cpuset control group subsystem
[    0.002865] Initializing cgroup subsys io
[    0.002917] Initializing cgroup subsys memory
[    0.002983] Initializing cgroup subsys devices
[    0.003026] Initializing cgroup subsys freezer
[    0.003070] Initializing cgroup subsys net_cls
[    0.003141] CPU: Testing write buffer coherency: ok
[    0.003227] ftrace: allocating 21246 entries in 63 pages
[    0.051843] CPU0: update cpu_capacity 1024
[    0.051910] CPU0: thread -1, cpu 0, socket 0, mpidr 80000000
[    0.051943] [bcm2709_smp_prepare_cpus] enter

#(たち上げ 省略その1)

[    2.154465] console [ttyAMA0] enabled
[    2.160720] of_cfs_init
[    2.165326] of_cfs_init: OK
[    2.182922] EXT4-fs (mmcblk0p2): mounted filesystem with ordered data mode. Opts: (null)
[    2.195358] VFS: Mounted root (ext4 filesystem) readonly on device 179:2.
[    2.212661] devtmpfs: mounted
[    2.218599] Freeing unused kernel memory: 476K (807eb000 - 80862000)
[    2.501294] random: systemd: uninitialized urandom read (16 bytes read, 71 bits of entropy available)
[    2.519201] systemd[1]: systemd 215 running in system mode. (+PAM +AUDIT +SELINUX +IMA +SYSVINIT +LIBCRYPTSETUP +GCRYPT +ACL +XZ -SECCOMP -APPARMOR)
[    2.538021] systemd[1]: Detected architecture 'arm'.
[    2.664486] NET: Registered protocol family 10
[    2.673050] systemd[1]: Inserted module 'ipv6'
[    2.681886] systemd[1]: Set hostname to .
[    2.689294] random: systemd: uninitialized urandom read (16 bytes read, 71 bits of entropy available)
[    2.703853] systemd[1]: Initializing machine ID from random generator.
[    2.713430] systemd[1]: Installed transient /etc/machine-id file.
[    2.794797] uart-pl011 3f201000.uart: no DMA platform data

#(たち上げ 省略その2)

[    4.288162] systemd[1]: Starting Create Static Device Nodes in /dev...
[  OK  ] Started Load/Save Random Seed.
[  OK  ] Started Show Plymouth Boot Screen.
[  OK  ] Reached target Paths.
[  OK  ] Created slice system-systemd\x2drfkill.slice.
         Starting Load/Save RF Kill Switch Status of rfkill0...
[  OK  ] Started Load/Save RF Kill Switch Status of rfkill0.
[  OK  ] Created slice system-ifup.slice.
[    5.542455] systemd-fsck[210]: fsck.fat 3.0.27 (2014-11-12)
[    5.544082] systemd-fsck[210]: /dev/mmcblk0p1: 132 files, 41536/82644 clusters
[  OK  ] Started File System Check on /dev/disk/by-partuuid/cedef3be-01.
         Mounting /boot...
[  OK  ] Mounted /boot.
[  OK  ] Reached target Local File Systems.

#(たち上げ 省略その3)

[  OK  ] Started D-Bus System Message Bus.
[  OK  ] Started Avahi mDNS/DNS-SD Stack.
         Starting System Logging Service...
[  OK  ] Started Restore Sound Card State.
[  OK  ] Started dhcpcd on all interfaces.
[  OK  ] Started LSB: triggerhappy hotkey daemon.
[  OK  ] Started LSB: Autogenerate and use a swap file.
[FAILED] Failed to start LSB: Start VNC Server at boot time.
See 'systemctl status vncboot.service' for details.
[  OK  ] Reached target Network.
         Starting OpenBSD Secure Shell server...
[  OK  ] Started OpenBSD Secure Shell server.
         Starting /etc/rc.local Compatibility...
[  OK  ] Reached target Network is Online.
         Starting LSB: Start NTP daemon...
         Starting Permit User Sessions...
[  OK  ] Started Login Service.
[  OK  ] Started Permit User Sessions.
         Starting Light Display Manager...
[  OK  ] Started System Logging Service.
[  OK  ] Started /etc/rc.local Compatibility.
[  OK  ] Started LSB: Start NTP daemon.
         Starting Terminate Plymouth Boot Screen...
         Starting Hold until boot process finishes up...

Raspbian GNU/Linux 8 rapi3 ttyAMA0

rapi3 login: root
Password: 
Last login: Wed May 31 09:17:47 JST 2017 on ttyAMA0
Linux rapi3 4.4.50-v7+ #970 SMP Mon Feb 20 19:18:29 GMT 2017 armv7l

The programs included with the Debian GNU/Linux system are free software;
the exact distribution terms for each program are described in the
individual files in /usr/share/doc/*/copyright.

Debian GNU/Linux comes with ABSOLUTELY NO WARRANTY, to the extent
permitted by applicable law.
root@rapi3:~# date
Wed 31 May 09:19:30 JST 2017
root@rapi3:~# 


(3)起動に問題があるときは、[FAILED]が赤文字で出て分かりやすい。


% ls -l /dev/tty.usbserial
crw-rw-rw-  1 root  wheel   37,  22  5 31 14:55 /dev/tty.usbserial

% system_profiler SPUSBDataType \
    | awk '
      /Product ID:/{p=$3}
      /Vendor ID:/{v=$3}
      /Manufacturer:/{sub(/.*: /,""); m=$0}
      /Location ID:/{sub(/.*: /,""); printf("%s:%s %s (%s)\n", v, p, $0, m);}
    ' | grep 2303
0x067b:0x2303 0x14100000 / 30 (Prolific Technology Inc.)
%

このMacについて>システムレポート
▼ USB 3.0バス
  USB-Serial Controller
USB-Serial Controller:
  製品ID:  0x2303
  製造元ID:  0x067b  (Prolific Technology, Inc.)
  バージョン:  3.00
  速度:  最高12 Mb/秒
  製造元:  Prolific Technology Inc.
  場所ID:  0x14100000 / 30
  利用可能な電流(mA):  500
  必要な電流(mA):  100
  高負荷時消費電流(mA):  0

(4)macOS Sierra でこのシリアルUSBケーブルが認識されると、macOSでは上記ように見える。

チップメーカURL
http://prolificusa.com/portfolio/pl2303hx-rev-d-usb-to-serial-bridge-controller/

(5)シリアルポートからのメッセージは以下のスクリプト usb_kermit_raspi.sh で自動で記録されるようにしている。ツールは伝統的な kermit を Homebrew からインストールして使っている。
% cat /usr/local/bin/usb_kermit_raspi.sh
#!/bin/sh
set -x
YMDHM=`date '+%Y%m%d_%H%M'`
cat /Users/myname/.kermrc_raspi |\
  sed -e s/append_raspi/append_raspi_${YMDHM}/ > \
  /Users/myname/.kermrc_raspi_YMD
kermit -y /Users/myname/.kermrc_raspi_YMD

% cat /Users/myname/.kermrc_raspi
set line /dev/tty.usbserial
set speed 115200
SET CARRIER-WATCH OFF
log session /Users/myname/Usr/RaspberryPi/ConsLog/append_raspi
connect

% ls -l /usr/local/bin/kermit
... Feb  3  2015 /usr/local/bin/kermit -> ../Cellar/c-kermit/9.0.302/bin/kermit

% head -7 /Users/myname/Usr/RaspberryPi/ConsLog/append_raspi_20170531_0917

Raspbian GNU/Linux 8 rapi3 ttyAMA0

rapi3 login: root
Password:
Last login: Wed May 31 09:16:10 JST 2017 on ttyAMA0
Linux rapi3 4.4.50-v7+ #970 SMP Mon Feb 20 19:18:29 GMT 2017 armv7l

シェルスクリプトの usb_kermit_raspi.sh は、ワークファイルが2つあって不細工である。ヒアドキュメント(heredoc)でスクリプト一つで書きたかったが、動いていれば、まあいいかと、なかなか書き直せない。


(6)シリアルポート接続(windows編)
  別記事 RPi_0023 win10_PL2303_teraterm

(7)PL2303 Mac OS X Driver Download
このWebページ、
http://www.prolific.com.tw/US/ShowProduct.aspx?p_id=229&pcid=41
を開いて、
PL2303 Mac OS X Driver Download  

Download File: PL2303_MacOSX_1.6.1_20160309.zip
 Mac OS X Universal Binary Driver v1.6.0 (PKG file format)
  For Mac OS Sierra (version 10.12)
  For Mac OS X El Capitan (version 10.11)
  For Mac OS X Yosemite (version 10.10)
  For Mac OS X Mavericks (version 10.9)
  For PL2303 H/HX/HXD/EA/RA/SA/TA/TB chip versions
  For Prolific USB VID_067B&PID_2303 Only
 Includes Driver Installation Manual
この PL2303_MacOSX_1_6_1_20160309.zip を展開してインストールでドライバはOKとなった。
% ls -l PL2303_MacOSX_1_6_1_20160309.zip
7135649 Mar  9  2016 PL2303_MacOSX_1_6_1_20160309.zip
% shasum PL2303_MacOSX_1_6_1_20160309.zip
52c3031ab1fda0b6fe58bc09c856cb6232aed782  PL2303_MacOSX_1_6_1_20160309.zip


2017年5月29日月曜日

RPi_0021 SSHクライアント

Windows版のsshクライアントはたくさんある。

ちら見でよさそうに見えたのは、
[windows ssh クライアント]でググって。

http://qiita.com/murachi1208/items/d6e4ce7ba75f1625fe51
Windowsターミナルソフト + Rlogin が最高すぎる!!

ダウンロードページ
http://nanno.dip.jp/softlib/man/rlogin/
RLoginは、Windows上で動作するターミナルソフトです。
RLogin (2.22.3) 2017/05/29

ここから rlogin_x64.zipをダウンロードして、すべて展開のあとRLogin.exeを走らせる。

起動時の初期画面

ここで、新規(N)を選ぶ

Server Edit Entry
エントリー/コメント、Server Address、User Name、Password、と
Terminal(T)は、kterm-colorとした。[OK]を押す。


さらに、表示(V) >オプション設定>スクリーン>
●フォントサイズから一行あたりの文字数を決定
初期値16(7.68) から 25(12.00)と文字を大きくした。


ファイル>サーバーに接続で、エントリーrapi3で、リモートログインできた。
※画面のコマンド lptest 80 12 は80カラム12 で表示フォントイメージの確認のため。


2017年5月27日土曜日

RPi_0020 初期設定

Raspberry PiでのRaspbian Jessie の2017-04-10版の初期設定の内容。

microSD をセットし電源投入後の、最初に行った設定処理をメモする。

Raspbianにログインするには、以下の4つの方法があるようだ。
1. HDMIディスプレイ表示(ディスプレイやUSBキーボードを接続)
2. LANケーブル接続(FingアプリやdhcpdログからIPアドレスを知る)
3. シリアルコンソール(要シリアルケーブル)
4. Pi ZeroをUSB OTGスレーブモード(要USBケーブルで設定:dwc2,g_ether)

このうち1.は一般的なHDMIケーブルとKB/MOUSEさえあれば、準備できるので簡単。
PIXEL desktopだと画面の説明が増えるので、コマンドラインからの操作説明とする。

LAN接続も/boot/sshの空ファイルがあると、sshリモートログイン可能だが、有線LANの無いモデルや、ネットワーク越しにsshできなくなったときのために、初回は、HDMIディスプレイとキーボード入力で処理しよう。

使ったKB/MOUSEは、ELECOM TK-FDM063BK で、

RasPi側のUSBポートにマイクロレシーバユニットを取り付けるだけで認識された。
$ lsusb の表示は、ID 1a81:1004 Holtek Semiconductor, Inc.

(1) 日本語キーボードの設定

# raspi-config
4 Localisation Options > I3 Change Keyboard Layout >
|Keyboard mode: Generic 105-key (Intl) PC
|Keyboard layout: Japanese
|Key to function as AltGr: The default for the keyboard layout
|Compose key: No compose key
とした。

手動での設定直しは、たとえば[rasbian keyboard 設定]とかでググるとよい。

a. キーボードの再構成

# dpkg-reconfigure keyboard-configuration
# service keyboard-setup restart

b. /etc/default/keyboard を編集

英語キーボードのとき
 /etc/default/keyboard
 XKBMODEL="pc105"
 XKBLAYOUT="us"
日本語キーボードのとき
 /etc/default/keyboard
 XKBMODEL="jp106"
 XKBLAYOUT="jp"

(2) ロケール(locale)

まずは今のロケールを見る。
% /usr/bin/localectl # 現在の設定を表示
   System Locale: LANG=en_GB.UTF-8
       VC Keymap: n/a
      X11 Layout: jp
       X11 Model: pc105
% egrep -v '^$|^#' /etc/locale.gen
en_GB.UTF-8 UTF-8
raspi-configで変更設定するのが簡単だが、関連項目も記載する。
# raspi-config
4 Localisation Options > I1 Change Locale(Set up language and regional setting)
Configuring locales
[ ] en_GB.UTF-8 UTF-8 を外して、
[*] en_US ISO-8859-1 をチェック。
[*] ja_JP.UTF-8 UTF-8 をチェック。
Default locale for the system environment: en_US とする。
# egrep -v '^$|^#' /etc/locale.gen
en_US ISO-8859-1
ja_JP.UTF-8 UTF-8
あるいは、# dpkg-reconfigure locales

4 Localisation Options > I2 Change Timezone(Set up timezone to match your locale)
Configuring tzdata
Asia > Tokyo
あるいは、# dpkg-reconfigure tzdata

# cat /etc/timezone
Asia/Tokyo
# ls -l /etc/timezone /etc/localtime
-rw-r--r-- 1 root root 333 Jun 29 11:21 /etc/localtime
-rw-r--r-- 1 root root  11 Jun 29 11:21 /etc/timezone
# cmp /usr/share/zoneinfo/Asia/Tokyo /etc/localtime
#/usr/share/zoneinfo以下のファイルが、/etc/localtimeにリンクされる。

必要に応じて、
Archのwiki を参照して、ロケールを設定する。
https://wiki.archlinuxjp.org/index.php/ロケール
man 1 locale, man 5 locale, man 7 localeなども役立つ。
 1 だれもが実行できるユーザコマンド
 5 ファイルフォーマットの説明、例 /etc/passwd
 7 その他 例:マクロパッケージや取り決め的な文書
関連項目:$ whereis locale; whatis locale

(3) ホスト名を変える

/etc/hostnameをviやnanoで編集するかもしくは、
# echo myhostname > /etc/hostname でもよい。

この変更したホスト名で*.localでアドレス指定したければAvahiや、Windowsでは、Bonjourを調べると良い。

(4) 作業ユーザーの作成

このWebページの説明がよくまとまっている。
04 Raspberry Pi 初期セキュリティ設定等
http://wings2fly.jp/yaneura/raspberry-pi-first-security-setting/
を参照して、adduser設定操作例を示す。
root@rapiz:/home/pi# adduser myname
Adding user `myname' ...
Adding new group `myname' (1001) ...
Adding new user `myname' (1001) with group `myname' ...
Creating home directory `/home/myname' ...
Copying files from `/etc/skel' ...
Enter new UNIX password:
Retype new UNIX password:
passwd: password updated successfully
Changing the user information for myname
Enter the new value, or press ENTER for the default
 Full Name []: MYNAME
 Room Number []:
 Work Phone []:
 Home Phone []:
 Other []:
Is the information correct? [Y/n] y
root@rapiz:/home/pi#

(5) ネットワークの設定

・無線LANは、以下のように設定した。
# cd /etc/wpa_supplicant
# cp -p wpa_supplicant.conf wpa_supplicant.conf.org
# wpa_passphrase SSID PASSWORD >> wpa_supplicant.conf
# cat wpa_supplicant.conf #確認
 # network={} を複数おくことが可能。

# ifdown wlan0 # wlan0インターフェイス DOWN
# ifup wlan0  # wlan0インターフェイス UP

# iwconfig wlan0 #SSID確認
# ifconfig wlan0 #IPアドレス確認

・有線LANで、固定アドレスを振りたいとき。
Debian(Raspbian)8 jessieでは、ネットワーク周りの設定は/etc/dhcpcd.confで行う。
従来の/etc/network/interfacesを編集してもdhcpcdにより上書きされるとのこと。

バージョン見方
% lsb_release -a ; cat /etc/debian_version /etc/issue

/etc/dhcpcd.confの初期状態は、
# egrep -v '^$|^#' /etc/dhcpcd.conf
hostname
clientid
persistent
option rapid_commit
option domain_name_servers, domain_name, domain_search, host_name
option classless_static_routes
option ntp_servers
require dhcp_server_identifier
slaac private
nohook lookup-hostname


2017年5月23日火曜日

RPi_0011 win32diskimager

RPi_0010 microSDの作成
(3-1)SDカードに書き込む(windows編)
  別記事 RPi_0011 win32diskimager
の記事で、以下はWindows10で操作した内容。
の記事にあたり、以下はWindows10で操作した内容。
 尚、書き込むイメージは(macOS編)はその2Raspbian Jessie Liteを使ったが、
 ここでは、その1のRaspbian Jessie with PIXEL desktop版を例としている。
 ファイル名 2017-04-10-raspbian-jessie.img サイズ4.0GB

・Win32 Disk Imagerの入手
http://sourceforge.jp/projects/sfnet_win32diskimager/ から、
https://ja.osdn.net/projects/sfnet_win32diskimager/ へ飛んだ。
最新ダウンロードファイル
readme-buildtools.txt (日付: 2017-03-14, サイズ: 592.00 B )
diskimager_de.qm (日付: 2017-03-09, サイズ: 12.79 KB)
Win32DiskImager-1.0.0-binary.zip (日付: 2017-03-08, サイズ: 16.19 MB)
Win32DiskImager-1.0.0-src.zip (日付: 2017-03-08, サイズ: 100.79 KB)
win32diskimager-1.0.0-install.exe (日付: 2017-03-08, サイズ: 11.99 MB)

ここで、Win32DiskImager-1.0.0-binary.zip をダウンロードした。
これを展開すると、

一番したのWin32DiskImager.exeをダブルクリックする。
ほんとうに実行していいかと聞かれる。ウィルス感染したら復旧できない方は、ここでいいえ。

自己責任ではいと、答えた方は以下の画面へ進む。

1.起動画面

(1) microSDをPCに挿すと、この例では、ファイルエクスプローラーにE:が出現して、8GB容量だとそれらしい7.39GBと表示される。これが、出力側Device [E:¥]となる。
(2) 入力ファイルのImage Fileは、2017-04-10-raspbian-jessie.imgを選択する。
(3) Writeボタンを押してmicroSDに書き込み手続き。


(4)実行最終確認。Confirm Target Device E:¥。出力がmicroSD Eドライブに間違いなければYesボタンで実行する。


(5)無事に書き込み成功すると、Write Successful.と出る。4GBの書き込みに、22分41秒かかった。正常な書き込みが行われているとファイルエクスプローラーにboot(E:)が出現する。
(6)本win32diskimagerを終了させて、microSDの安全に取り外すを行って、microSDを抜く。


2017年5月20日土曜日

RPi_0010 microSDの作成

Raspberry Pi3とケースと電源アダプタが到着したので、microSDの作成から開始する。

・購入品のメモ。価格はAmazonから購入時点。
1.Raspberry Pi 3 Model B V1.2 (日本製) 国内正規代理店品
 チップワンストップ 価格:¥5,222
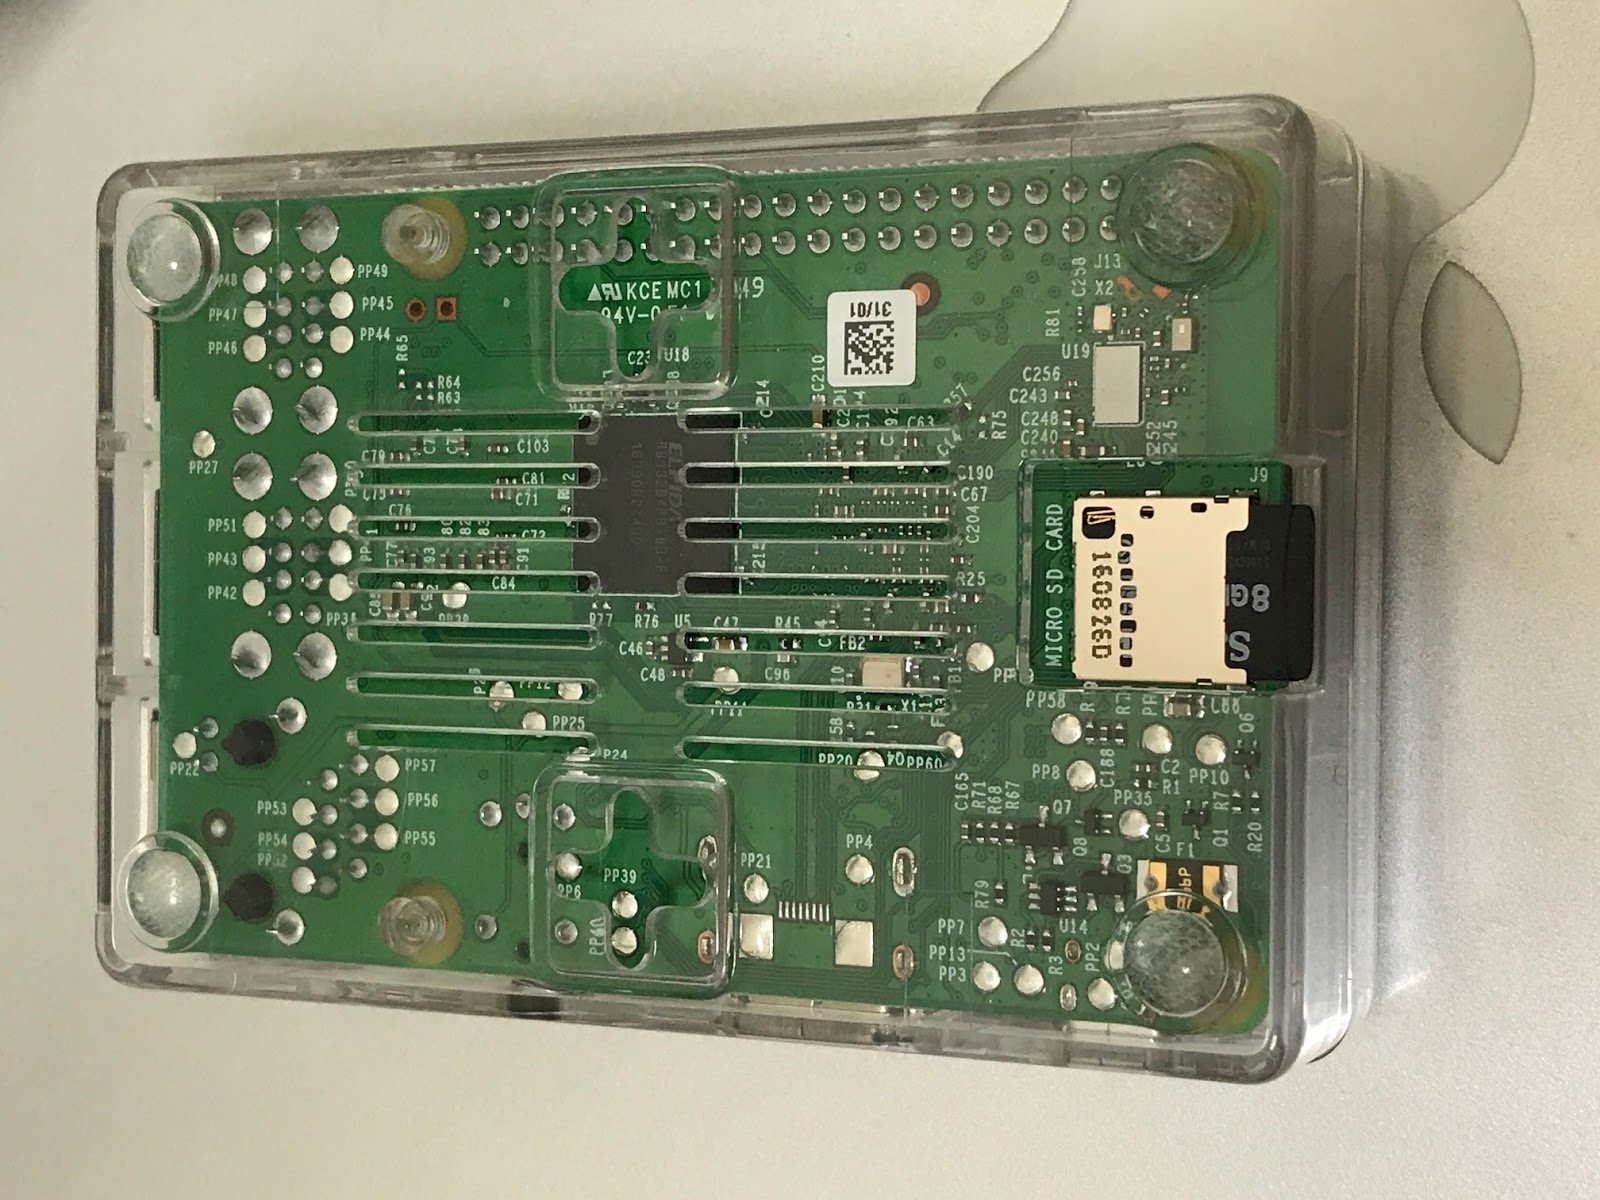
2.Raspberry Pi 3 Model B ケース + ヒートシンク クリア
 KuGi 価格:¥829
3.Raspberry Pi 3 model B 専用電源 ACアダプタ 5.1V/2.5A
きばん本舗 価格:¥1,640

本家のraspberrypi.orgからRaspbianのmicroSDイメージファイルをダウンロードする。
https://www.raspberrypi.org/downloads/raspbian/

その1
|Raspbian Jessie with PIXEL
|RImage with PIXEL desktop based on Debian Jessie
|RVersion: April 2017
|RRelease date: 2017-04-10
|RKernel version: 4.4
|RSHA-1: 6d7b11bb3d64524203edf6c80c499456fb5fef53

その2
|Raspbian Jessie Lite
|RMinimal image based on Debian Jessie
|RVersion: April 2017
|RRelease date: 2017-04-10
|RKernel version: 4.4
|RSHA-1: c24a4c7dd1a5957f303193fee712d0d2c0c6372d

(1)ここではその2のRaspbian Jessie Liteをダウンロードする。

https://downloads.raspberrypi.org/raspbian_lite_latest
のページを開くと、
http://director.downloads.raspberrypi.org/raspbian_lite/images/raspbian_lite-2017-04-10/2017-04-10-raspbian-jessie-lite.zip
が呼びだされる。

(2)macOSターミナルでのダウンロードファイルの確認と展開
% ls -l 2017-04-10-raspbian-jessie-lite.zip
 307785777  5 20 21:46 2017-04-10-raspbian-jessie-lite.zip
% ls -lh 2017-04-10-raspbian-jessie-lite.zip
      294M  5 20 21:46 2017-04-10-raspbian-jessie-lite.zip
% shasum 2017-04-10-raspbian-jessie-lite.zip   # sumチェック
c24a4c7dd1a5957f303193fee712d0d2c0c6372d  2017-04-10-raspbian-jessie-lite.zip
%
% unzip 2017-04-10-raspbian-jessie-lite.zip    # 展開
Archive:  2017-04-10-raspbian-jessie-lite.zip
  inflating: 2017-04-10-raspbian-jessie-lite.img
% ls -l 2017-04-10-raspbian-jessie-lite.img
  1297862656  4 10 18:58 2017-04-10-raspbian-jessie-lite.img
% ls -lh 2017-04-10-raspbian-jessie-lite.img    #約1.2GBの.imgが出来ている
               1.2G  4 10 18:58 2017-04-10-raspbian-jessie-lite.img

(3)SDカードに書き込む(macOS編)
# 書き込むmicroSDを取り付けると勝手にマウントされる。
# df -H
Filesystem      Size   Used  Avail   Mounted on
/dev/disk0s2    999G   635G   364G   /
devfs           201k   201k     0B   /dev
map -hosts        0B     0B     0B   /net
map auto_home     0B     0B     0B   /home
/dev/disk2s1     79M    21M    57M   /Volumes/Untitled

# Untitledボリュームをアンマウントする。
# diskutil unmountDisk /dev/disk2
Unmount of all volumes on disk2 was successful

# 出力ファイル側が、microSDの /dev/disk2 であること十分確認。
# time dd bs=1m if=2017-04-10-raspbian-jessie-lite.img of=/dev/disk2
1237+1 records in
1237+1 records out
1297862656 bytes transferred in 570.426499 secs (2275250 bytes/sec)
dd bs=1m if=2017-04-10-raspbian-jessie-lite.img of=/dev/disk2  0.00s user 6.94s system 1% cpu 9:31.66 total
# 1.3GBのファイルをmicroSDに書き込むのに9分30秒かかった。

# df -H
Filesystem      Size   Used  Avail   Mounted on
/dev/disk0s2    999G   635G   364G   /
devfs           201k   201k     0B   /dev
map -hosts        0B     0B     0B   /net
map auto_home     0B     0B     0B   /home
/dev/disk2s1     42M    21M    21M   /Volumes/boot
# macOSのオートマウントでmicroSDのRaspbian bootパーティションが勝手にマウントされる。
# bootのボリュームをアンマウントして、microSDを取り外す。
# diskutil unmountDisk /dev/disk2
Unmount of all volumes on disk2 was successful

# 念入りは人はさらに# df -H して /Volumes/boot がないことを確認してから、
# microSDを取り外すと良い。


(3-1)SDカードに書き込む(windows編)
  別記事 RPi_0011 win32diskimager

ここで出来たmicroSDをRaspberry Pi3の底にあるmicroSDスロットに挿す。


2016年8月30日火曜日

obsA7-009 Debian8 jessie

obsA7のDebian7 wheezy 再起動不可をきっかけに、Debian8 jessie に移行した時のメモです。

1.Debian7 wheezy 再起動不可

初回のDebian7 wheezyインストール (記事2013年12月16日 obsA7-001 購入SSD取付け起動) から、問題なく動いていたが、ある日のこと2016.8.11再起動するとread: ERRORとBad Data CRCで停止してしまった。
reading NAND page at offset 0x128c800 failed
 62914560 bytes read: ERROR
## Booting image at 02000000 ...
   Image Name:   OBSA7 3.2.54-1
   Created:      2014-11-26   1:15:22 UTC
   Image Type:   ARM Linux Multi-File Image (uncompressed)
   Data Size:    47747335 Bytes = 45.5 MB
   Load Address: 00008000
   Entry Point:  00008000
   Contents:
   Image 0:  2583736 Bytes =  2.5 MB
   Image 1: 45163587 Bytes = 43.1 MB
   Verifying Checksum ... Bad Data CRC
openblocks>> 

パッケージuboot-imageは1.2.13-2だけれど、これは以下のFAQから、
http://openblocks.plathome.co.jp/products/obs_a/a7/faq4.html#faq-517
FAQ.ファームウェアアップデートを実行したら起動しなくなりました。どうすれば復旧できますか。
A.TFTPサーバを利用したファームウェアのアップデートを行うことで復旧できます。

にて復活するようだったが、これを機会にDebian7 wheezyからDebian8 jessieにアップグレードし、kernelは3.2.54から4.1.19になる。さらにSSDも増量することにした。

2.準備物と参照したページと必要ファイル

2-1. OpenBlocks A7 リリース情報 http://openblocks.plathome.co.jp/support/software/a7/

2-1-1. OpenBlocks A7 7から8へのアップグレード
http://openblocks.plathome.co.jp/support/guide/a7/verup_to_8.html

2-1-2. Debian 8のファームウェアのダウンロード(2016-04-04版)
http://ftp.plathome.co.jp/pub/OBSA7/jessie/4.1.19-0/uImage.initrd.obsa7
ここのuImage.initrd.obsa7をTFTPサーバ側に置いて、obsA7のSW2 ON起動でobsA7復旧用となる。
このuImage.initrd.obsa7で不便がなければ以降のkernelビルド操作は不要。
obsa7_defconfig.txt:42:# CONFIG_BRIDGE is not set
この2016-04-04版のuImage.initrd.obsa7はBRIDGEが無効だったので、kernelビルドすることにした。

2.2. OpenBlocksファームウェア作成ガイド
https://github.com/plathome/debian_based_firmware
対応ファームウェア
機種  Debian  TARGET  DIST  ARCH
A7  8  obsa7  jessie  armel
にてobsa7はjessieに対応している。で、
# cd build_ramdisk
# ./buildall.sh -M obsa7 -D jessie
準備ブツが整っていれば、このbuildall.sh一発でuImage.initrd.obsa7ができそうだが、 ここplathomeガイドの丁寧な解説に補足してステップごとに確認しながら作業を進める。

2.3. 調達したSSD
Samsung SSD 850EVOシリーズ 250GB(ベーシックキット) MZ-75E250B/IT
SSDの選定が正しいか不明だが、コスパで選んだ。
https://www.google.co.jp/webhp?rls=ig&gws_rd=ssl#q=MZ-75E250B

3. 準備

3.1 作成ホスト
Macbook Pro(Early 2011)OSX El Capitan のParallels Desktop 11 for Macに、
ubuntu-ja-16.04-desktop-amd64.isoからUbuntuをインストールして母艦とした。
◯ubuntu 16.04 LTS 日本語 Remix リリース
https://www.ubuntulinux.jp/News/ubuntu1604-ja-remix
tsubota@macbp:Ubuntu16.04% ls -lh ubuntu-ja-16.04-desktop-amd64.iso
-rw-rw-r--  1 tsubota  wheel   1.3G  4 29 13:24 ubuntu-ja-16.04-desktop-amd64.iso
[ubuntu 16.04 parallels]でググるとデスクトップ画面が真っ黒になるのは、3Dアクセラレーション設定をオンにした状態でParallels Toolsを再インストールとありにて解決。

3.2. Gitリポジトリの取得
Ubuntu16.04# apt-get update
Ubuntu16.04# apt-get install git
Gitリポジトリを取得します。
Ubuntu16.04$ git clone git://github.com/plathome/debian_based_firmware.git
以下では、ディレクトリdebian_based_firmwareに移動したものとして説明。とあり、ここではパス${BASEDIR}/debian_based_firmwareとする。

3.3. クロス開発環境
ファームウェアの作成に必要なパッケージをインストール。
Ubuntu16.04# cd ${BASEDIR}/debian_based_firmware/build_ramdisk
Ubuntu16.04# ./build_crossenv.sh
問題なくbuild_crossenv.shは実行された。$ gcc --version|head -1で、
gcc (Ubuntu 5.4.0-6ubuntu1~16.04.2) 5.4.0 20160609 がgccバージョン。

3.4. カーネルソース
3.4.1. カーネル取得
カーネルソースをぷらっとホームのFTPサイトからダウンロード。
Ubuntu16.04$ cd ${BASEDIR}/debian_based_firmware/source/obsa7
Ubuntu16.04:obsa7$ wget http://ftp.plathome.co.jp/pub/OBSA7/jessie/4.1.19-0/linux-4.1.19-obs-20160401.tar.xz
Ubuntu16.04:obsa7$ ls -l linux-4.1.19-obs-20160401.tar.xz
86704504 Apr 1 12:01 linux-4.1.19-obs-20160401.tar.xz

3.4.2. カーネル展開
Ubuntu16.04$ cd ${BASEDIR}/debian_based_firmware/source/obsa7
Ubuntu16.04:obsa7$ xz -dc linux-4.1.19-obs-20160401.tar.xz| tar xf -

3.5. DVDイメージ取得
Ubuntu16.04$ cd ${BASEDIR}/debian_based_firmware/isofiles
Ubuntu16.04:isofiles$ wget http://ftp.riken.jp/Linux/debian/debian-cd/current/armel/iso-dvd/debian-8.5.0-armel-DVD-1.iso
Ubuntu16.04:isofiles$ ls -l debian-8.5.0-armel-DVD-1.iso
4694073344 Jun 5 06:17 debian-8.5.0-armel-DVD-1.iso

4. ファームウェアを作成する。

Ubuntu16.04# cd ${BASEDIR}/debian_based_firmware/build_ramdisk
#### ./buildall.sh -M obsa7 -D jessie
buildall.shはステップごとに確認するのでこの一発スクリプトは実行せず5.へ。

5. カスタマイズはステップごとに

シェルスクリプトbuild_ramdisk/buildall.shを実行することは、DIST=jessie, TARGET=obsa7の場合、以下の通り実行することと同じ。
Ubuntu16.04# cd ${BASEDIR}/debian_based_firmware/build_ramdisk
Ubuntu16.04:build_ramdisk# DIST=jessie TARGET=obsa7 ./build_debootstrap.sh
Ubuntu16.04:build_ramdisk# DIST=jessie TARGET=obsa7 ./build_kernel.sh
Ubuntu16.04:build_ramdisk# DIST=jessie TARGET=obsa7 ./build_ramdisk.sh
Ubuntu16.04:build_ramdisk# DIST=jessie TARGET=obsa7 ./release_firmware.sh
(# export DIST=jessie TARGET=obsa7とするのもよい)

5.0.1 build_debootstrap.sh
Debian 基本システムをインストールdebootstrapを実行し、ディレクトリrootfs/jessie_obsa7以下にDebianを仮インストールする。
<Check_5.0.1>
→cd ${BASEDIR}/debian_based_firmware/rootfs/jessie_obsa7
にルート構成があるか?

5.0.2 build_kernel.sh
カーネルとカーネルモジュールのコンパイル。
<Check_5.0.2>
→cd ${BASEDIR}/debian_based_firmware/source/obsa7/linux-4.1.19
に以下のファイルが出来ているか?
Ubuntu16.04:linux-4.1.19# ls -l net/bridge/bridge.ko
-rw-r--r--  1 root  wheel  116300  8 25 13:58 net/bridge/bridge.ko
Ubuntu16.04:linux-4.1.19# ls -l arch/arm/boot/zImage
-rwxr-xr-x  1 root  wheel  2899384  8 25 13:58 arch/arm/boot/zImage
Ubuntu16.04:linux-4.1.19# ls -l arch/arm/boot/dts/kirkwood-openblocks_a7.dtb
-rw-r--r--  1 root  wheel  11479  8 25 13:22 arch/arm/boot/dts/kirkwood-openblocks_a7.dtb
zImageとkirkwood-openblocks_a7.dtbをcatして、zImage.dtbになる。

5.0.3 build_ramdisk.sh
ディレクトリrootfs/jessie_obsa7以下に仮インストールしたDebianをOpenBlocks用に変更して、RAMディスクイメージを作成。
<Check_5.0.3>
→cd ${BASEDIR}/debian_based_firmware/rootfs
に以下のファイルが出来ているか?
Ubuntu16.04:rootfs# ls -l ramdisk-jessie.obsa7.img
-rw-r--r-- root wheel 188743680 Aug 25 14:04 ramdisk-jessie.obsa7.img

5.0.4 release_firmware.sh
ファームウェア一式を作成。
→cd ${BASEDIR}/debian_based_firmware/release/obsa7/jessie/4.1.19-0
に以下のファイルが出来ているか?
Ubuntu16.04:4.1.19-0# ls -l
  -rw-r--r--  1 root  wheel       337 Aug 28 23:18 MD5.obsa7
  -rw-r--r--  1 root  wheel   1237687 Aug 28 23:17 System.map
  -rw-r--r--  1 root  wheel   8950032 Aug 28 23:17 kernel+modules-4.1.19-0.tar.xz
  -rw-r--r--  1 root  wheel  59792790 Aug 28 23:17 kernel-image-4.1.19-0-obsa7.deb
  -rw-r--r--  1 root  wheel  58335052 Aug 28 23:17 ramdisk-jessie.obsa7.img.gz
  -rw-r--r--  1 root  wheel  61245992 Aug 28 23:17 uImage.initrd.obsa7
  -rw-r--r--  1 root  wheel   2910863 Aug 28 23:17 zImage.dtb
ここで出来たuImage.initrd.obsa7をflashcfgする。

5.1. カーネル
5.1.1. コンフィグレーションの変更
cd ${BASEDIR}/debian_based_firmware/source/obsa7/linux-4.1.19/
の.configからビルド構成される。元ネタは、
Ubuntu16.04:linux-4.1.19# ls -l arch/arm/configs/obsa7_defconfig
-rw-r--r-- 1 root  wheel 96194  3 31 17:09 arch/arm/configs/obsa7_defconfig

# cp -p arch/arm/configs/obsa7_defconfig .config
# make oldconfig
# make menuconfig  ここで、CONFIG_BRIDGEを生かす。
# cp -p .config ../linux-4.1.19.dot.config
もしくは、
# DIST=jessie TARGET=obsa7 ./kernel_menuconfig.sh
オリジナルなobsa7_defconfigで5.0.2 build_kernel.shが通り、5.0.4 release_firmware.shで出来たuImage.initrd.obsa7をflashcfgして正しく起動確認したあと、CONFIG_BRIDGEを有効にした。
*menuconfigのBRIDGEモジュールへ変更位置
  Networking  --->
    Networking options  --->
  <M>  802.1d Ethernet Bridging ←BRIDGEモジュールへ変更
いろいろいじったので正確さに欠けるがついでに以下のあたりが変わった。
% diff linux-4.1.19.dot.config_ORG linux-4.1.19.dot.config_3
633a634
> CONFIG_BRIDGE_NETFILTER=m
767a769
> # CONFIG_NETFILTER_XT_MATCH_PHYSDEV is not set
915a918,919
> # CONFIG_NF_TABLES_BRIDGE is not set
> # CONFIG_BRIDGE_NF_EBTABLES is not set
924c928,930
< # CONFIG_BRIDGE is not set
---
> CONFIG_STP=m
> CONFIG_BRIDGE=m
> CONFIG_BRIDGE_IGMP_SNOOPING=y
927a934
> CONFIG_LLC=m

5.9 気づいたことの変更点

正常に起動するものの /sbin/initからの/etc/init.d/rcSが起動するコンソールメッセージがttyS0に表示されなかった。以下のように/dev/consoleを作ると解消された。
<Update_5.0.1>
cd ${BASEDIR}/debian_based_firmware/rootfs/jessie_obsa7/dev
root@ubuntu1604:dev# mknod -m 600 console c 5 1 root@ubuntu1604:dev# ls -l console crw------- 1 root root 5, 1 8月 28 22:37 console
この後、RAMディスクイメージを作成しなおす。
# DIST=jessie TARGET=obsa7 ./99_create_ramdisk.sh
さらに、ファームウェアを作成しなおす。
# DIST=jessie TARGET=obsa7 ./release_firmware.sh

6. ファームウェアの反映

uImage.initrd.obsa7をOBSA7に送って、flashcfgのあと再起動する。
root@obsa7:~# flashcfg -y -f uImage.initrd.obsa7
root@obsa7:~# reboot

再起動のコンソールメッセージを以下に示す。

Broadcast message from root@obsa7 (ttyS0) (Mon Aug 29 11:04:51 2016):

The system is going down for reboot NOW!
[ ok  Sending processes the T[....] Stopping MTA: exim4_listener.
[ ok ] Stopping ISC DHCP server: dhcpd.
[ ok ] Stopping internet superserver: inetd.
[ ok ] Stopping monitoring init button daemon for openblocks: pshd.
[ ok ] Stopping LED control daemon for openblocks: runled.
[ ok ] Saving random seed...done.
[....] Stopping domain name service...: bind9waiting for pid 1753 to die
. ok
[ ok ] Asking all remaining processes to terminate...done.
[ ok ] All processes ended within 2 seconds...done.
[ ok ] Stopping enhanced syslogd: rsyslogd.
[info] Saving the system clock.
[info] Hardware Clock updated to Mon Aug 29 11:04:57 JST 2016.
[ ok ] Deconfiguring network interfaces...done.
[ ok ] Will now deactivate swap:.
[....] Will now unmount union filesystems ( /etc /bin /home /lib /sbin /usr /var[ ok t /opt /srv /media):.
[....] Will now unmount /.rw filesystem (/.rw):umount: /.rw (/dev/sda1) unmounted
. ok
[....] Will now unmount local filesystems:umount: /dsk/sda4 (/dev/sda4) unmounted
umount: /dsk/sda2 (/dev/sda2) unmounted
. ok
[info] Will now restart.
[42054.565904] reboot: Restarting system


U-Boot 1.1.4 (Feb  5 2014 - 12:38:30)
Plat'Home version: 1.2.13 A7 (Base: Marvell version: 3.5.9)

U-Boot code: 00600000 -> 0067FFF0  BSS: -> 006CF480

Soc: 88F6282 A1CPU running @ 600Mhz L2 running @ 300Mhz
SysClock = 300Mhz , TClock = 200Mhz

DRAM (DDR3) CAS Latency = 6 tRP = 5 tRAS = 15 tRCD=5
DRAM CS[0] base 0x00000000   size 256MB
DRAM CS[1] base 0x10000000   size 256MB
DRAM CS[2] base 0x20000000   size 256MB
DRAM CS[3] base 0x30000000   size 256MB
DRAM Total size   1GB  16bit width
Addresses 8M - 0M are saved for the U-Boot usage.
Mem malloc Initialization (8M - 7M): Done
NAND:256 MB
POST:  mac verify Eth0 PASSED Eth1 PASSED

CPU : Marvell Feroceon (Rev 1)

Streaming disabled
Write allocate disabled

Module 0 is RGMII

USB 0: host mode
USB 1: host mode
USB 2: host mode
USB 3: host mode
Net:   egiga0, egiga1
Hit any key to stop autoboot:  0

Run Boot Selection Script

*** SW 1 IS OFF ***

*** SW 2 IS OFF ***

*** SW 3 IS OFF, Standard Boot ***

Bootargs: root=/dev/ram vmalloc=200M rootdelay=7 mtdparts=nand_mtd:0x1c0000@0x0(uboot)ro,0x2c0000@0x1c0000(env),0x160000@0x480000(test)ro,0x540000@0x5e0000(conf),0x3d40000@0xb20000(linux),0x9660000@0x4860000(user),0x2140000@0xdec0000(opt) ubi.mtd=4 console=ttyS0,115200

NAND read: device 0 offset 0xb20000, size 0x3c00000

Reading data from 0x471f800 -- 100% complete.
 62914560 bytes read: OK
## Booting image at 02000000 ...
   Image Name:   OBSA7 4.1.19-0
   Created:      2016-08-28  14:17:25 UTC
   Image Type:   ARM Linux Multi-File Image (uncompressed)
   Data Size:    61245928 Bytes = 58.4 MB
   Load Address: 00008000
   Entry Point:  00008000
   Contents:
   Image 0:  2910863 Bytes =  2.8 MB
   Image 1: 58335052 Bytes = 55.6 MB
   Verifying Checksum ... OK
OK

Starting kernel ...

[    0.000000] Booting Linux on physical CPU 0x0
[    0.000000] Initializing cgroup subsys cpuset
[    0.000000] Initializing cgroup subsys cpu
[    0.000000] Initializing cgroup subsys cpuacct
[    0.000000] Linux version 4.1.19 (root@ubuntu1604) (gcc version 5.4.0 20160609 (Ubuntu/Linaro 5.4.0-6ubuntu1~16.04.1) ) #2 PREEMPT Thu Aug 25 13:58:36 JST 2016
[    0.000000] CPU: Feroceon 88FR131 [56251311] revision 1 (ARMv5TE), cr=0005397f
[    0.000000] CPU: VIVT data cache, VIVT instruction cache
[    0.000000] Machine model: Plat'Home OpenBlocksA7
[    0.000000] Memory policy: Data cache writeback
[    0.000000] Built 1 zonelists in Zone order, mobility grouping on.  Total pages: 260528
[    0.000000] Kernel command line: root=/dev/ram vmalloc=200M rootdelay=7 mtdparts=nand_mtd:0x1c0000@0x0(uboot)ro,0x2c0000@0x1c0000(env),0x160000@0x480000(test)ro,0x540000@0x5e0000(conf),0x3d40000@0xb20000(linux),0x9660000@0x4860000(user),0x2140000@0xdec0000(opt) ubi.mtd=4 console=ttyS0,115200
[    0.000000] PID hash table entries: 4096 (order: 2, 16384 bytes)
[    0.000000] Dentry cache hash table entries: 131072 (order: 7, 524288 bytes)
[    0.000000] Inode-cache hash table entries: 65536 (order: 6, 262144 bytes)
[    0.000000] Memory: 976768K/1048576K available (4167K kernel code, 173K rwdata, 1128K rodata, 152K init, 98K bss, 71808K reserved, 0K cma-reserved, 221184K highmem)
[    0.000000] Virtual kernel memory layout:
[    0.000000]     vector  : 0xffff0000 - 0xffff1000   (   4 kB)
[    0.000000]     fixmap  : 0xffc00000 - 0xfff00000   (3072 kB)
[    0.000000]     vmalloc : 0xf3000000 - 0xff000000   ( 192 MB)
[    0.000000]     lowmem  : 0xc0000000 - 0xf2800000   ( 808 MB)
[    0.000000]     pkmap   : 0xbfe00000 - 0xc0000000   (   2 MB)
[    0.000000]     modules : 0xbf000000 - 0xbfe00000   (  14 MB)
[    0.000000]       .text : 0xc0008000 - 0xc0533f18   (5296 kB)
[    0.000000]       .init : 0xc0534000 - 0xc055a000   ( 152 kB)
[    0.000000]       .data : 0xc055a000 - 0xc0585700   ( 174 kB)
[    0.000000]        .bss : 0xc0585700 - 0xc059df78   (  99 kB)
[    0.000000] SLUB: HWalign=32, Order=0-3, MinObjects=0, CPUs=1, Nodes=1
[    0.000000] Preemptible hierarchical RCU implementation.
[    0.000000]  Additional per-CPU info printed with stalls.
[    0.000000] NR_IRQS:16 nr_irqs:16 16

(省略)

[    2.275993] Waiting 7 sec before mounting root device...
[    2.281794] ata1.00: supports DRM functions and may not be fully accessible
[    2.289408] ata1.00: configured for UDMA/133
[    2.306690] scsi 0:0:0:0: Direct-Access     ATA      Samsung SSD 850  2B6Q PQ: 0 ANSI: 5
[    2.316454] sd 0:0:0:0: [sda] 488397168 512-byte logical blocks: (250 GB/233 GiB)
[    2.324641] sd 0:0:0:0: Attached scsi generic sg0 type 0
[    2.331072] sd 0:0:0:0: [sda] Write Protect is off
[    2.336689] sd 0:0:0:0: [sda] Write cache: enabled, read cache: enabled, doesn't support DPO or FUA
[    2.347862]  sda: sda1 sda2 sda3 sda4
[    2.354801] sd 0:0:0:0: [sda] Attached SCSI disk
[    2.506247] usb 1-1: new high-speed USB device number 2 using orion-ehci
[    2.656778] usb 1-1: New USB device found, idVendor=0424, idProduct=2514
[    2.663542] usb 1-1: New USB device strings: Mfr=0, Product=0, SerialNumber=0
[    2.672070] hub 1-1:1.0: USB hub found
[    2.676042] hub 1-1:1.0: 4 ports detected
[    2.956242] usb 1-1.2: new high-speed USB device number 3 using orion-ehci
[    3.104024] usb 1-1.2: New USB device found, idVendor=0411, idProduct=015d
[    3.110997] usb 1-1.2: New USB device strings: Mfr=1, Product=2, SerialNumber=3
[    3.118376] usb 1-1.2: Product: 802.11 n WLAN
[    3.122773] usb 1-1.2: Manufacturer: Ralink
[    3.127008] usb 1-1.2: SerialNumber: 1.0
[    9.296368] RAMDISK: gzip image found at block 0
[   20.045354] EXT4-fs (ram0): couldn't mount as ext3 due to feature incompatibilities
[   20.053454] EXT4-fs (ram0): mounting ext2 file system using the ext4 subsystem
[   20.062703] EXT4-fs (ram0): mounted filesystem without journal. Opts: (null)
[   20.070100] VFS: Mounted root (ext2 filesystem) readonly on device 1:0.
[   20.077605] Freeing unused kernel memory: 152K (c0534000 - c055a000)
Mount failed for selinuxfs on /sys/fs/selinux:  No such file or directory
INIT: version 2.88 booting
[....] Starting the hotplug events dispatcher: udevd[   20.833029] systemd-udevd[654]: starting version 215
[   20.852631] random: udevd urandom read with 31 bits of entropy available
. ok
[....] Synthesizing the initial hotplug events...[   21.336776] orion_wdt: Initial timeout 21 sec
[   21.562971] cfg80211: Calling CRDA to update world regulatory domain
done.
[....] Waiting for /dev to be fully populated...[   21.986330] usb 1-1.2: reset high-speed USB device number 3 using orion-ehci
[   22.169046] ieee80211 phy0: rt2x00_set_rt: Info - RT chipset 3070, rev 0201 detected
[   22.250825] ieee80211 phy0: rt2x00_set_rf: Info - RF chipset 0005 detected
[   22.362382] usbcore: registered new interface driver rt2800usb
done.
[   24.266767] EXT4-fs (ram0): re-mounted. Opts: (null)
[   24.766317] cfg80211: Calling CRDA to update world regulatory domain
fsck from util-linux 2.25.2
DEBIAN: clean, 95279/1313760 files, 723360/5245214 blocks
dumpe2fs 1.42.12 (29-Aug-2014)
[   25.451062] EXT4-fs (sda1): mounted filesystem with ordered data mode. Opts: (null)
[   25.538766] EXT4-fs (sda1): mounted filesystem with ordered data mode. Opts: (null)
[   25.592866] EXT4-fs (sda1): re-mounted. Opts: discard
[   25.653320] aufs test_add:283:mount[893]: uid/gid/perm /etc 0/0/0775, 0/0/0755
[   26.057151] aufs test_add:283:mount[921]: uid/gid/perm /root 0/0/0700, 0/0/0755
[....] Starting the hotplug events dispatcher: udevd[   26.573598] systemd-udevd[955]: starting version 215
. ok
[ ok ] Synthesizing the initial hotplug events...done.
[....] Waiting for /dev to be fully populated...[   27.946330] cfg80211: Calling CRDA to update world regulatory domain
done.
Extract optional files from FlashROM(mtd6)... [   31.106499] cfg80211: Calling CRDA to update world regulatory domain
fail(or empty).
[ ok ] Setting hostname to 'obsa7'...done.
[ ok ] Will now activate lvm and md swap:done.
[info] Will now check all file systems.
fsck from util-linux 2.25.2
Checking all file systems.
[....] Done checking file systems. A log is being saved in /var/log/fsck/checkfs[ ok hat location is writable..
[ ok ] Cleaning up temporary files...[....] Cleaning /tmp...done.
[ ok .
[info] Loading kernel module ipv6.
[   32.701231] NET: Registered protocol family 10
[   32.826989] IPv6: ADDRCONF(NETDEV_UP): eth1: link is not ready
[   34.326253] cfg80211: Calling CRDA to update world regulatory domain
[   35.967705] mv643xx_eth_port mv643xx_eth_port.1 eth1: link up, 1000 Mb/s, full duplex, flow control disabled
[   35.977659] IPv6: ADDRCONF(NETDEV_CHANGE): eth1: link becomes ready
[   37.506275] cfg80211: Calling CRDA to update world regulatory domain
[   37.987206] IPv6: ADDRCONF(NETDEV_UP): eth1: link is not ready
[ ok ] Will now mount local filesystems:.
[ ok ] Will now activate swapfile swap:done.
[ ok ] Checking minimum space in /tmp...done.
[ ok ] Cleaning up temporary files....
[ ok ] Setting kernel variables ...done.
[ ok ] Initializing random number generator...done.
[ ok ] Configuring network interfaces...done.
[ ok ] Cleaning up temporary files....
INIT: Entering runlevel: 2
[ ok ] Starting enhanced syslogd: rsyslogd.
[ ok ] Starting domain name service...: bind9.
[ ok ] Starting internet superserver: inetd.
[ ok ] Starting monitoring init button daemon for openblocks: pshd.
[ ok ] Starting LED control daemon for openblocks: runled.
[ ok ] Starting OpenBSD Secure Shell server: sshd.
[ ok ] Starting periodic command scheduler: cron.
[ ok ] Starting MTA: exim4.
[....] Running local boot scripts (/etc/rc.local)/etc/init.d/bridge.sh start

Debian GNU/Linux 8 obsa7 ttyS0

obsa7 login: root
Password:
Last login: Sun Aug 28 23:26:19 JST 2016 on ttyS0
Linux obsa7 4.1.19 #2 PREEMPT Thu Aug 25 13:58:36 JST 2016 armv5tel

The programs included with the Debian GNU/Linux system are free software;
the exact distribution terms for each program are described in the
individual files in /usr/share/doc/*/copyright.

Debian GNU/Linux comes with ABSOLUTELY NO WARRANTY, to the extent
permitted by applicable law.
root@obsa7:~# date
Mon Aug 29 11:08:04 JST 2016
root@obsa7:~# uname -a
Linux obsa7 4.1.19 #2 PREEMPT Thu Aug 25 13:58:36 JST 2016 armv5tel GNU/Linux
root@obsa7:~# cat /etc/issue
Debian GNU/Linux 8 \n \l

root@obsa7:~# cat /etc/os-release|head -1
PRETTY_NAME="Debian GNU/Linux 8 (jessie)"
root@obsa7:~#

root@obsa7:~# df -H                            [995] (16-08-29 Mon 11:15:58 AM)
Filesystem      Size  Used Avail Use% Mounted on
/dev/root       183M  153M   22M  88% /
tmpfs           106M  189k  106M   1% /run
tmpfs           5.3M     0  5.3M   0% /run/lock
devtmpfs         11M     0   11M   0% /dev
tmpfs           212M     0  212M   0% /run/shm
/dev/sda1        22G  2.5G   18G  13% /.rw
aufs             22G  2.5G   18G  13% /etc
aufs             22G  2.5G   18G  13% /bin
aufs             22G  2.5G   18G  13% /home
aufs             22G  2.5G   18G  13% /lib
aufs             22G  2.5G   18G  13% /sbin
aufs             22G  2.5G   18G  13% /usr
aufs             22G  2.5G   18G  13% /var
aufs             22G  2.5G   18G  13% /root
aufs             22G  2.5G   18G  13% /opt
aufs             22G  2.5G   18G  13% /srv
aufs             22G  2.5G   18G  13% /media
/dev/sda2        32G  9.3G   21G  31% /dsk/sda2
/dev/sda4       189G  5.7G  174G   4% /dsk/sda4
root@obsa7:~#                                  [996] (16-08-29 Mon 11:17:13 AM)
root@obsa7:~# brctl show                      [1001] (16-08-30 Tue 18:24:24 PM)
bridge name bridge id  STP enabled interfaces
br0  8000.000a85090174 no  eth0
       wlan0
安定版(stable)ディストリビューションのDebian8 jessieに無事アップデート出来た。このobsA7はさらに長生きし活躍するだろう。
この移行中にobs600が代行稼働していた。こちらも今はDebian7 wheezyなので、jessieに移行したい。


2015年3月10日火曜日

Android-008 lollipop化(Nexus7)

10.Nexus7 (2012 Model:ME370T)lollipop編

前出の Android-006 root化(Nexus6)と同様に、
に引き続いてNexus7 (2012版)をlollipop Androidバージョン:5.0.2 ビルド番号:LRX22Gにアップデートした。
これは以前の Nexus7-01 4.2.2(JDQ39) からの更新だ。

(1)メインパネル確認
[Change]ボタンで、Your model type:アップデート前の現バージョンNexus7(Wi-Fi Tablet)とAndroid:4.2.2 Build:JDQ39を選ぶ。

(1-1)ドライバ動作確認
[Full Driver Installation Guide - Automatic + Manual]ボタンでStep4[Full Driver Test]をSuccess!の動作確認する。

(2)メインパネルの[Flash Stock+Unroot]ボタンを押す。
Android:5.0.2 Build:LRX22Gを選ぶ。

(2-1)Factory imageは、'Force Flash Mode' でLRX22GのStock ROMをFlashする。

(2-1)Factory imageはすでにダウンロードされていた。ファイル名はnakashi-lrx22g-factory-2291c36b.tgzのはず。

(2-2)DOS窓が開いて、'bootloader','radio','boot','cache','recovery','system','userdata'の領域がFlashされていく。ところが、ここで、
|
sending 'bootloader' (2100 KB)...
OKAY [  0.296s]
writing 'bootloader'...
FAILED (remote: (InvalidState))
finished. total time: 0.452s
rebooting into bootloader...
OKAY [  0.016s]
finished. total time: 0.016s
|
bootloader書込みでエラー発生か。FAILEDが眼に留まって、だめかもとも思ったが影響は不明であるが不都合なく続行した。

(2-2)Flash Stockの成功したか。NAKASI-GROUPER: Android 5.0.2 - Build:LRX22Gが書き込めたように見える。

(3)メインパネルの[Root]ボタンを押す。
ここでこんどもCustom Recoveryにチェックをいれた。

(3-1)Enjoy your rooted device ^_^がでた。

(4)NRT - Live Log このFlash Stock時の一連のログの記録。
Information: Checking ADB/FASTBOOT Connectivity
adb devices
adb server is out of date.  killing...
* daemon started successfully *
List of devices attached 
MySerialNo device


fastboot devices

Connectivity Status: ADB Device Connected
Information: Rebooting your device into bootloader mode...
adb reboot bootloader

Information: Checking Fastboot Connectivity
fastboot devices
MySerialNo fastboot

Connectivity Status: Fastboot Device Connected
Launching flashstock.bat
Nexus Root Toolkit v2.0.4

Masterlists:
- LatestToolkitFiles.ini 3013
- AndroidDeviceListFull.ini 3013
- AndroidDeviceListFlash.ini 3013

NAKASI-GROUPER: Android 5.0.2 - Build: LRX22G

Live log initiated [2015-03-09]:

Information: Checking ADB Connectivity
adb devices
List of devices attached 
MySerialNo device


Connectivity Status: ADB Device Connected
Information: Rebooting your device into bootloader mode...
adb reboot bootloader

Information: Checking Fastboot Connectivity
fastboot devices
MySerialNo fastboot

Connectivity Status: Fastboot Device Connected
Information: Rebooting your device...
Information: Waiting for your device...
Information: Device Detected
Information: Checking ADB/FASTBOOT Connectivity
adb devices
adb server is out of date.  killing...
* daemon started successfully *
List of devices attached 
MySerialNo device


fastboot devices

Connectivity Status: ADB Device Connected
Information: Rebooting your device into bootloader mode...
adb reboot bootloader

Information: Checking Fastboot Connectivity
fastboot devices
MySerialNo fastboot

Connectivity Status: Fastboot Device Connected
Launching flashstock.bat
Information: Checking ADB/FASTBOOT Connectivity
adb devices
List of devices attached 
MySerialNo device


fastboot devices

Connectivity Status: ADB Device Connected
Information: Rebooting your device into bootloader mode...
adb reboot bootloader

Information: Checking Fastboot Connectivity
fastboot devices
MySerialNo fastboot

Connectivity Status: Fastboot Device Connected
Information: Temporarily Booting modified boot.img to enable running privileged commands...
fastboot boot "C:\Program Files (x86)\WugFresh Development\Nexus Root Toolkit\data\Modified_Boot\modified_boot_nakasi_5.0.2_LRX22G.img"

Information: Waiting for your device...
Information: Device Detected
Information: Pushing root files to your device...
adb push "C:\Program Files (x86)\WugFresh Development\Nexus Root Toolkit\data\Root_Files\busybox-signed.zip" "/sdcard/!ReadyToFlash/Root_Files/busybox-signed.zip"
adb server is out of date.  killing...
* daemon started successfully *

adb push "C:\Program Files (x86)\WugFresh Development\Nexus Root Toolkit\data\Root_Files\UPDATE-SuperSU-v2.46.zip" "/sdcard/!ReadyToFlash/Root_Files/UPDATE-SuperSU-v2.46.zip"

adb push "C:\Program Files (x86)\WugFresh Development\Nexus Root Toolkit\data\Root_Files\perm-recovery-signed.zip" "/sdcard/!ReadyToFlash/Root_Files/"perm-recovery-signed.zip"

adb push "C:\Program Files (x86)\WugFresh Development\Nexus Root Toolkit\data\Root_Files\openrecoveryscript" "/cache/recovery/openrecoveryscript"

Information: Rebooting your device into bootloader mode...
adb reboot bootloader

Information: Checking Fastboot Connectivity
fastboot devices
MySerialNo fastboot

Connectivity Status: Fastboot Device Connected
Information: Flashing Custom Recovery to RECOVERY partition...
fastboot flash recovery "C:\Program Files (x86)\WugFresh Development\Nexus Root Toolkit\data\Recovery_Custom\TWRP\openrecovery-twrp-2.8.5.1-grouper.img"

Information: Temporarily Booting TWRP...
fastboot boot "C:\Program Files (x86)\WugFresh Development\Nexus Root Toolkit\data\Recovery_Custom\TWRP\openrecovery-twrp-2.8.5.1-grouper.img"

Information: Rooting...
Information: Waiting for your device...
Information: Device Detected

(5)Root化の確認。

(6)雑感。
NRTはボタンを押すだけで所望の更新動作をしてくれるので大変ありがたい。
ユーザデータも、Android-001 root化(ISW13HT) 0.事前準備・予備知識での、
% adb backup / adb restore でほとんど綺麗に退避/復元してくれた。
さらに、Nexus7は2012年9月の購入なのに、いまだにAndroid5.xにアップデートできるのには感心する。Nexus6ほどサクサクは動かなくとも実用十分でまだまだ現役で使えそうだ。